| Skeleton Project |
This tutorial will walk you through creating a project that connects to the Fleet Web Service. You can use this skeleton project to quickly create your own application by adding your own functionality and behavior.
This topic contains the following sections:
Open Visual Studio and create a new C# or VB.NET Windows Forms application. Give the project an appropriate name.
In Visual Studio, ensure that your project has a reference to the Fleet Web Service API:
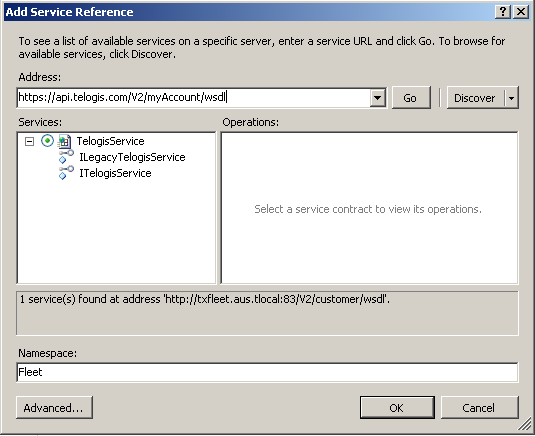
- In Solution Explorer, right-click your project and select Add Service Reference... (.NET 2: then click Advanced (at lower left), and click Add Web Reference).
- For the Address (.NET 2: API URL), enter https://<customer>.api.telogis.com/V2/<customer>/wsdl, where <customer> is your account name.
- Click Go.
- Change the Namespace (.NET 2: Web reference name) to Fleet, then click OK.
The way you connect to the API depends on whether you are using .NET 4 or .NET 2. In either case, the basic approach is the same: you use TelogisService to log in and obtain an authentication token, then assign that authentication token to an authentication header which is used by the LegacyTelogisService. The LegacyTelogisService provides accss to the Fleet Web service.
The main difference is that .NET 4 uses a TelogisServiceClient object to access the TelogisService and a LegacyTelogisServiceClient object to access the LegacyTelogisService. By contract, .NET 2 creates instances of TelogisService and LegacyTelogisService.
Begin by adding references to your Form object for the object(s) you will use for connecting to the LegacyTelogisService.
.NET 4
Add a load event to your form. Modify the load event to match the code snippet below.
|
.NET 4
// When the form loads, configure and log in to the service:
private void Form1_Load(object sender, EventArgs e) {

    // Avoid HTTP417 errors caused by some proxies:
    System.Net.ServicePointManager.Expect100Continue = false;

    // Create client to log in:
    Fleet.TelogisServiceClient tsclient = new Fleet.TelogisServiceClient();

    // Log in to obtain an authentication token:
    string authtoken = tsclient.Login(string.Format("{0}:{1}", customer, user), pword);

    // Create a token-using client for accessing the API:
    service = new Fleet.LegacyTelogisServiceClient();
    header = new Fleet.AuthenticationHeader();
    header.SessionID = authtoken;

    // Every call to the service must pass the header as the first argument.
  }
You can also use Java to develop client applications. A skeleton project using Java would look something like the following: TelogisServiceLocator l = new TelogisServiceLocator();
ITelogisService ts = l.getTelogisService();
String authToken = ts.login("account:user", "pword");
AuthenticationHeader header = new AuthenticationHeader();
header.setSessionID(authToken);
ILegacyTelogisService lts = l.getLegacyTelogisService();
((LegacyTelogisServiceStub)lts).setHeader("https://acme.api.telogis.com/V2/acme/wsdl", "AuthenticationHeader", header); |